Author: ivanhannel
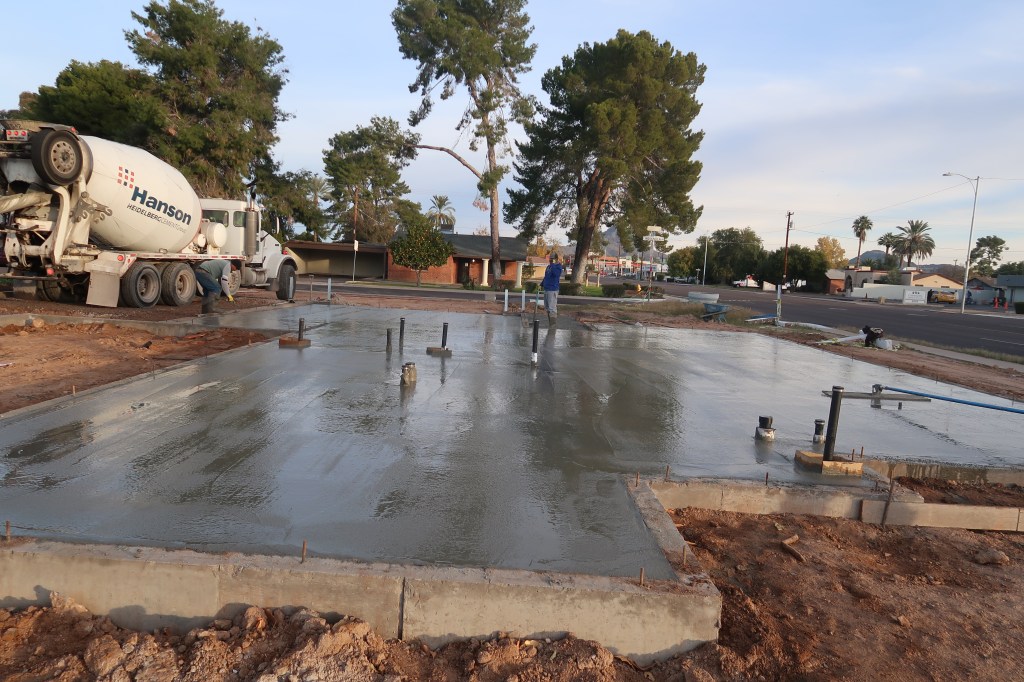
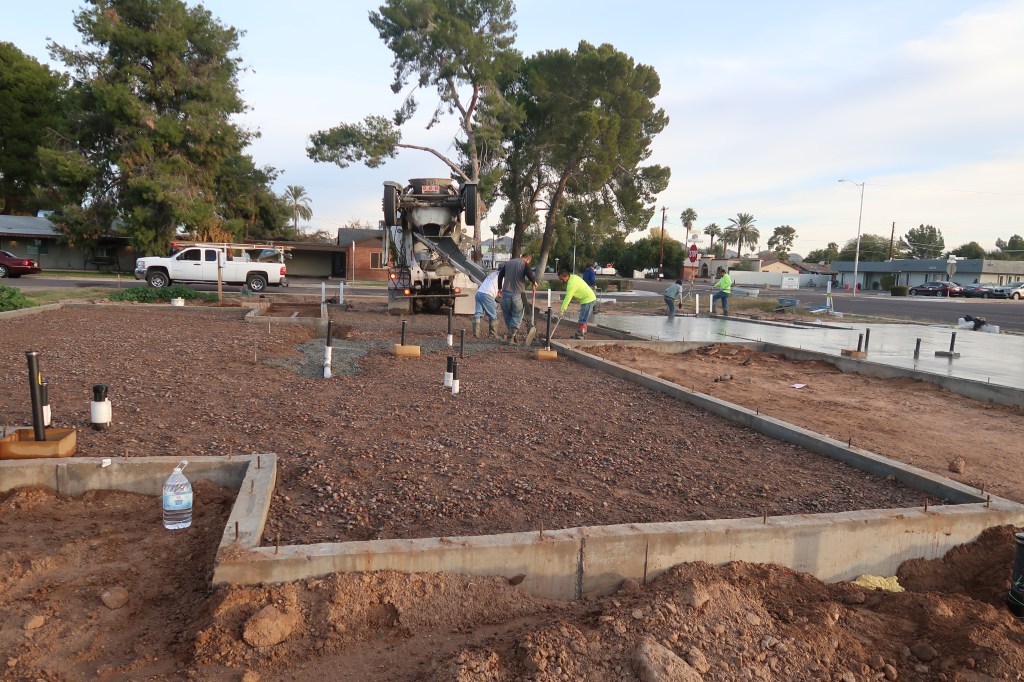
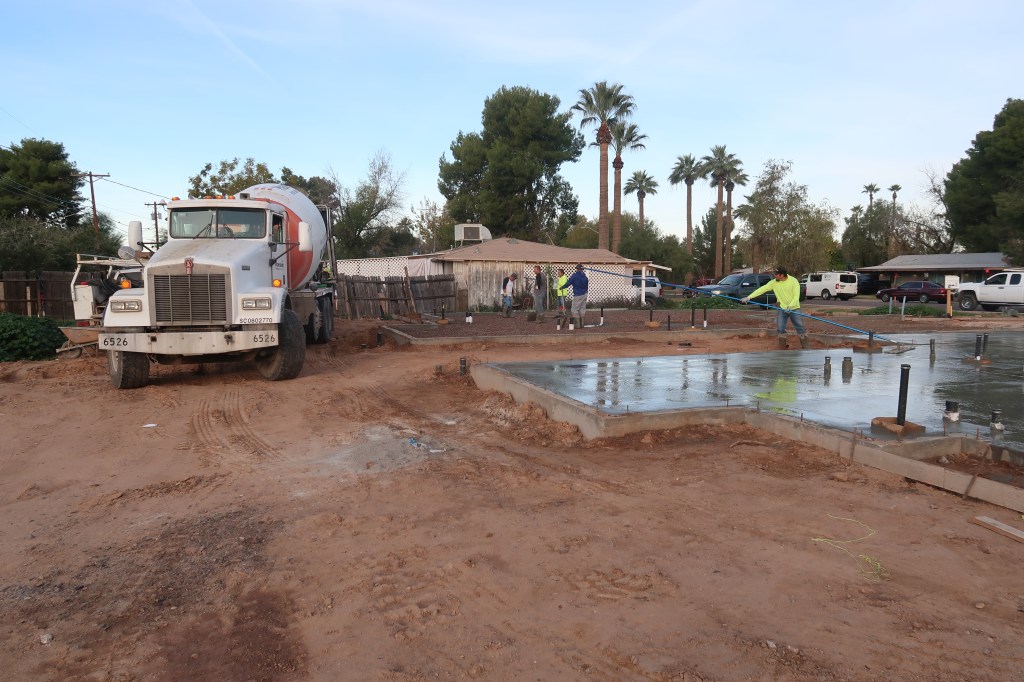
Slab Pour–Finally!
Due to weather, it was several days before we were able to pour the slab on Saturday, December 20th, 2019. It was really cool to see the concrete fill in the stem walls and get spread around. I was a bit worried that some malefactor would come by and put his footprints in the wet cement or sign his name or something like that, but I kept checking and no such thing happened. We were lucky to pour concrete on that day because the weather has been otherwise very wet and rainy. That’s actually good for the concrete, as it slows the time to cure and make the concrete as hard as it can be.


Before the Slab Pour: ABC Aggregate
Before we can pour a slab, we have to have “ABC” aggregate material to fill most of the cavity formed by the stem walls. The slab will sit or float on the materials. I asked someone why it is called “ABC” aggregate and the letters merely refer to three different sizes of material (rock/gravel). So, you basically just fill up the space with aggregate and allow it to settle and then pour the slab. Below are some photos of the aggegate in place.

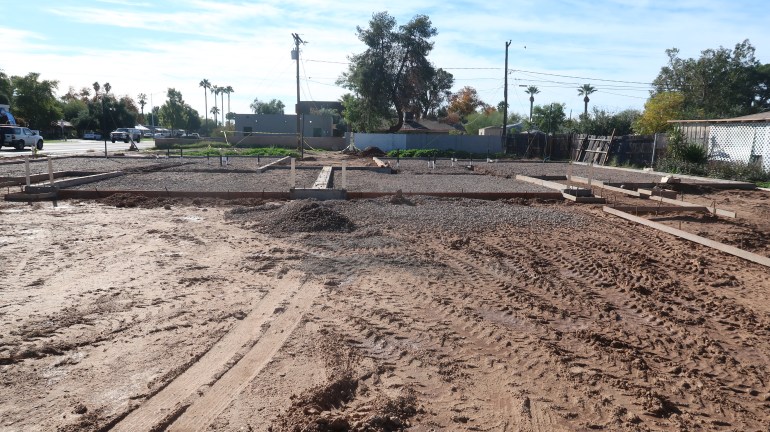
Levelling the Ground Before the ABC and Slab
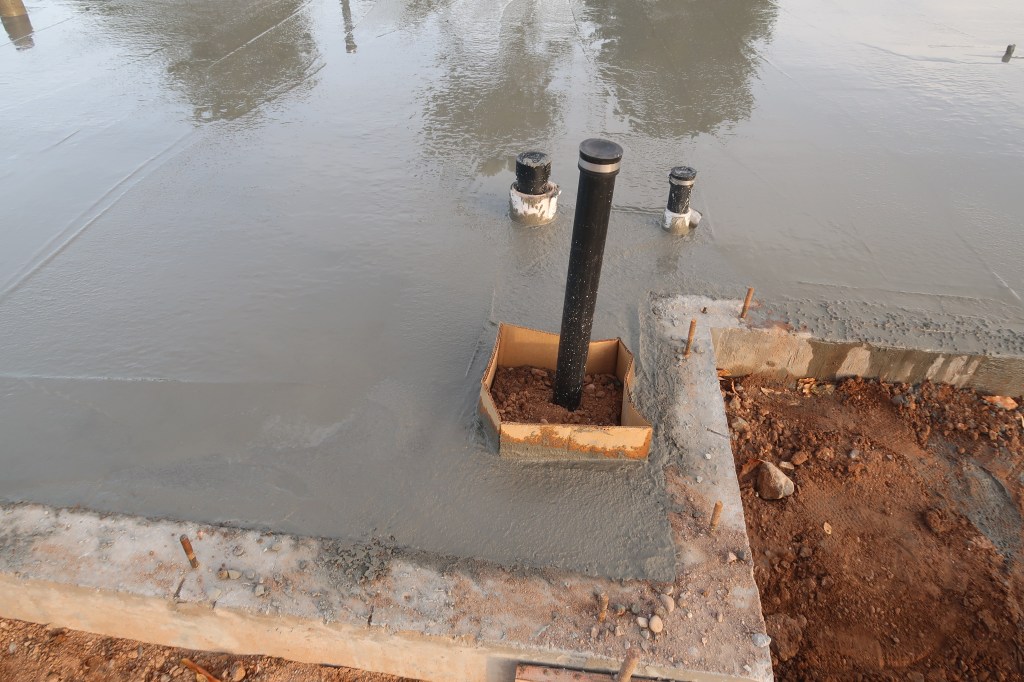
After the Rough Plumbing: Next Steps
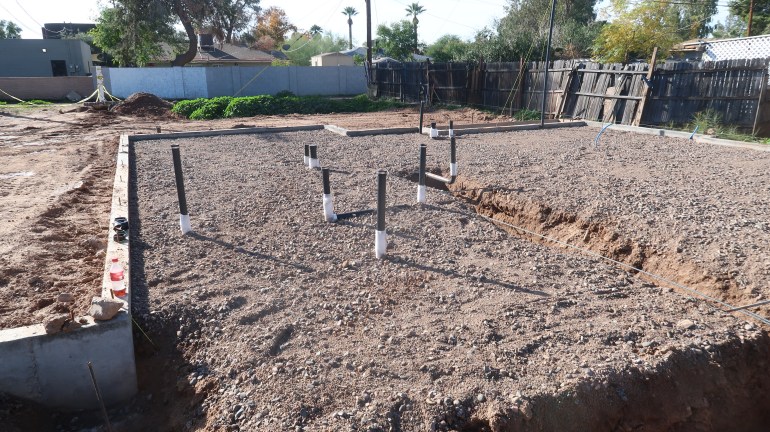
Rough Plumbing Installed–Ties and Sunlight
In this video, I talk about failing an initial inspection of the rough plumbing and why you have to keep your ABS pipe away from sunlight.
Measuring for Fence Block
In the video above, I talk about putting in a block fence using “fence block,” which is not quite as big, sturdy, or expensive as regular 8” by 8” by 16” block.
Watering Dirt
In the video above, I’m watering the land as I was inspected by the Air Quality people and they asked me to ensure the dirt was appropriately moist, particularly in areas where vehicles were coming in and out of the land.
Stem Walls Poured and Next Steps
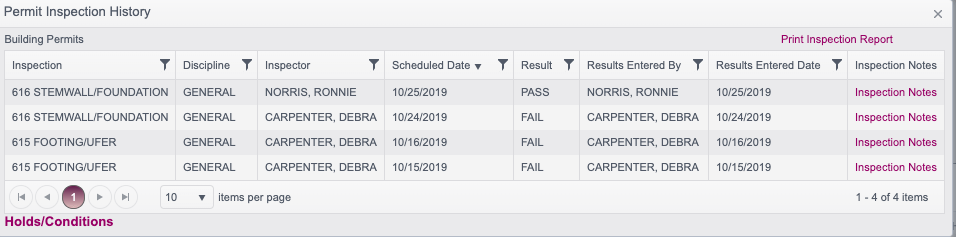
The stem walls, which are the short walls that lift the framing of the house above the grade of the land were approved by the inspector. Actually, we failed at first and had to add some vertical rebar to a wall because it was supposedly a “fire wall.” I’m not sure if that is actually the case or not, but the inspector who failed us just told my concrete contractor that he had to add drill some rebar into the footings, which he then did. After that was done, we had a second inspection and were approved to pour the stem walls, which we just did.
I learned that the City of Phoenix’s Planning and Development Department has an online site where you can check your permit status. The link is here.
Seeing the stem walls in place is a nice hallmark. It gives me a sense that the project is really moving. Next comes putting in the sewer lines that go from all the fixtures in the house to the main sewer line. Of course, there’s an inspection to do right after those are placed. Note that it’s more than just the sewer lines: You have to think about anything that might go underground beneath the slab of concrete that is going to become the floor of the structures. For instance, there’s a kitchen island on the plans and if I want to have electricity there, I have to make sure my plumber puts in a “sleeve” so that we can get an electrical wire to the island. If I want the island to be where a sink goes, then we have to put in drainage and water lines, too. Given that, I’m thinking the island will probably just have an electrical line to it and call it a day.
I also met with my plumber to discuss the rough plumbing. At one point, we ended up discussing tankless hot water heaters. Because I only have electrical power and not gas, if I wanted a tankless system, it has to be all electric. The problem is that they can draw up to 120 amps and the each structure is limited to 200 amps. If you imagine a person is using the air conditioner, the dryer, and a tankless hot water heater–let alone recharging their electric vehicle–it just won’t work. Instead, we’ll go for a conventional hot water system with a heat pump on it, a sort of very efficient conventional hot water heater with a recirculating line and that will be a good compromise between efficiency and, well, having enough electricity to supply the rest of the house during peak loads.
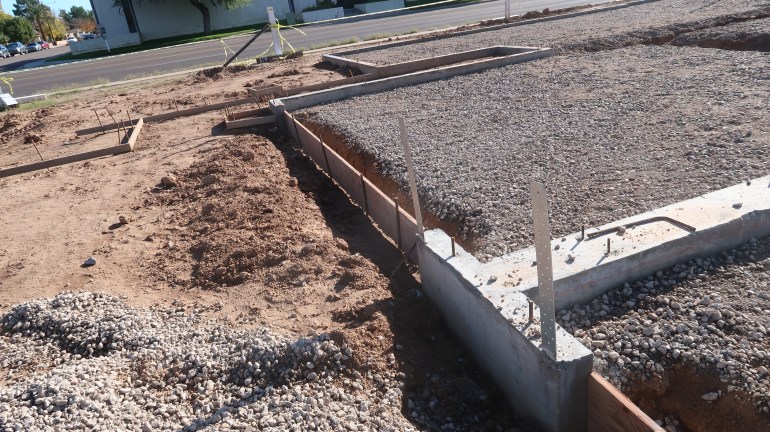
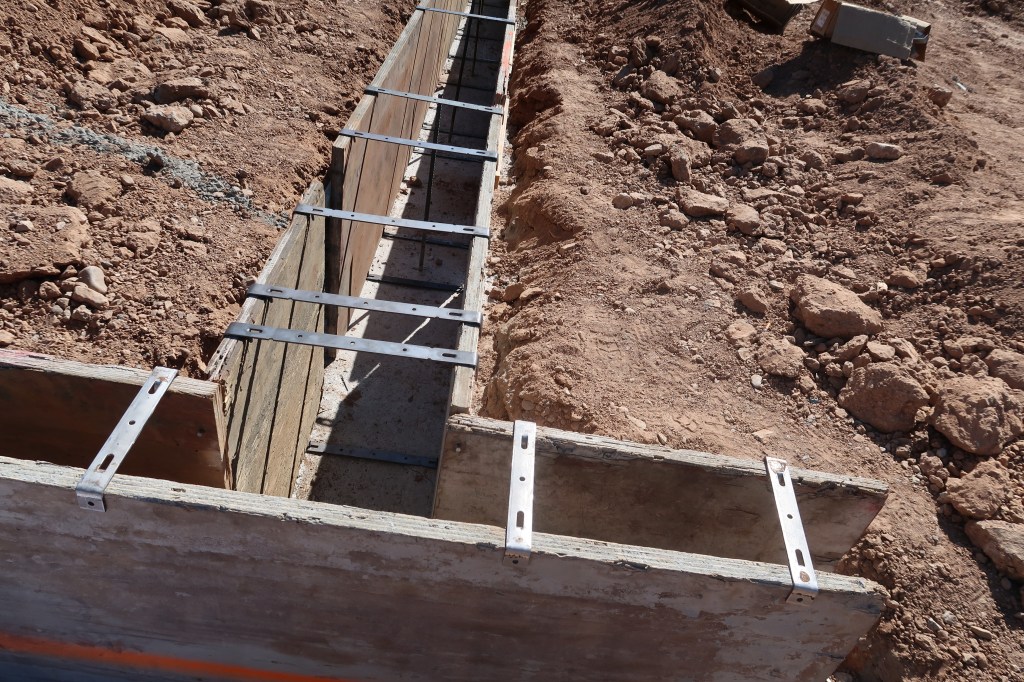
Stem Wall Forms Being Placed


Footings, Rebar, Ufers, and Concrete
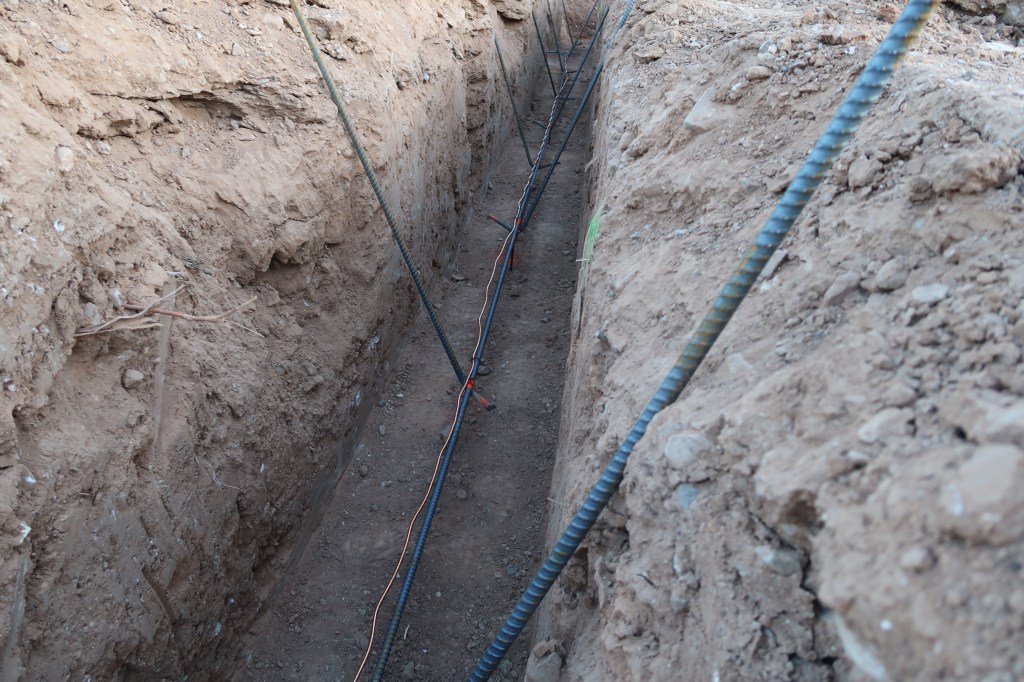
It’s been a stressful but ultimately successful week. The footings were dug and then rebar was placed inside the footings. I was surprised to see how little rebar was actually in the ground, just a single length of horizontal-laying rebar sitting in the trench; then, in intervals around 2 or 3 feet, a piece of rebar in the shape of a “J” tied to that the length of rebar at the bottom of the trenching and sticking up vertically.
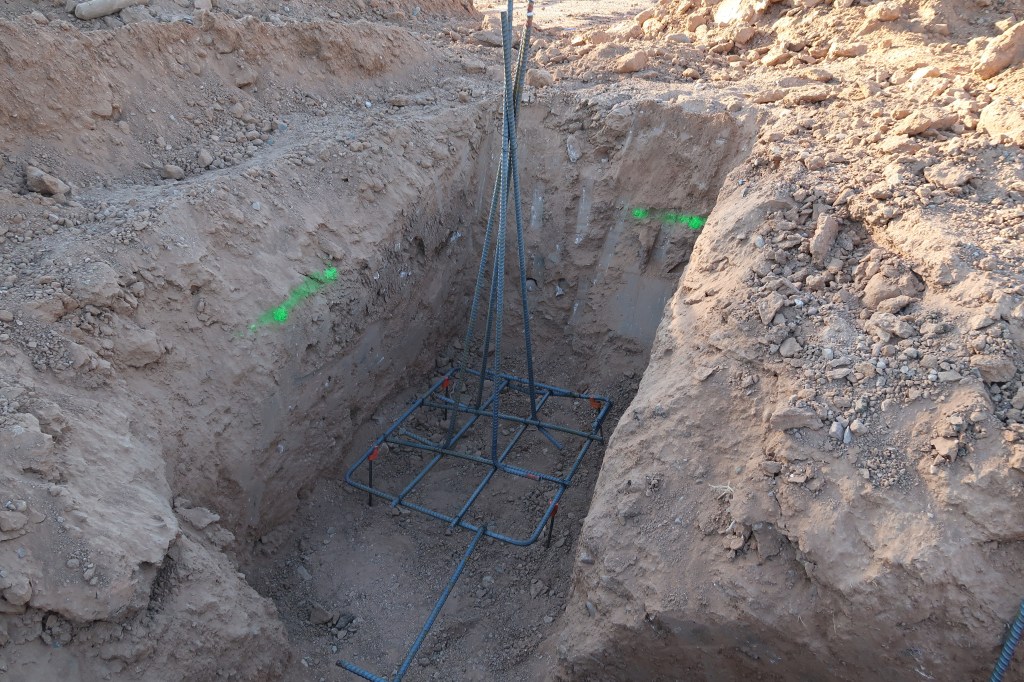
As above, at the corners, I noticed these teepees of rebar, for lack of a better term tied to what seems like a rebar-platform in the shape of a tic-tac-toe. When I first saw that, I thought, “Blair witch in rebar?” I’m not 100% sure why the corners have a more substantial rebar form, but I’m sure there is a good reason. Maybe it is because of where the beams in the roof will meet in pairs or something?
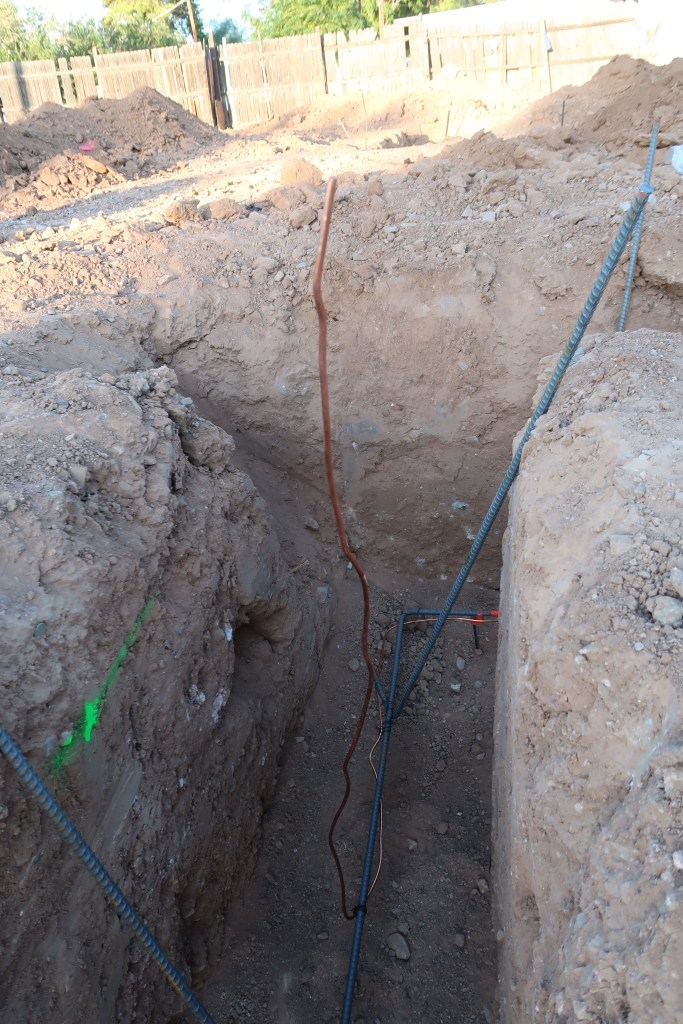
After rebar was placed, we had to place the “Ufer” copper grounding wire and tie that to the rebar. The above-ground portion of the Ufer has to be longer than what you may see in the above video, but we didn’t want to show anyone that there was copper sticking up out of the ground. So, we’ll join that piece of copper with another piece of copper wire that will eventually lead the last ten feet or so to the electrical panel.
After all that was done, I called the city to have an inspector come for our very first inspection. When the inspector first came, she couldn’t conduct the inspection because she needed hard copies of the soil inspection report as well as the pad certification document. It was a bit frustrating, because had I known I needed them, I would have brought them. I had already gotten a certified copy of the approved plans and put that in a document-box we placed onsite, so that was a bit disappointing.

The inspector also noted that she needed string-lines drawn at the property lines–from the little posts that my surveyor marked at each corner–to check and make sure our footings were far enough away from each property line, meaning on all four sides. I ended up having my concrete guy have some of his people go back to the land to do this, but for some reason, his people drew only a single string-line at the west-most boundary, and they actually put the line right over or near the footing. Apparently, they had decided to mark the correct distance (3’6”) away from the western property line–the necessary setback distance–rather than demarcate the actual property line. So because the property line wasn’t marked, the inspector said she couldn’t check for sure if my footings were at the proper distance.
The inspector noted that the footings were 16 inches wide and the stem wall is generally 6 inches wide and that you can “move” the stem-wall from the on-center position to any side of the footings, if we needed up to 10 inches of space. So, there’s that if we end up being too close to the property line.

The inspector did pass us for the first inspection of the footings. Then came the concrete trucks. I am not sure how many trucks came, but at least two and probably more.
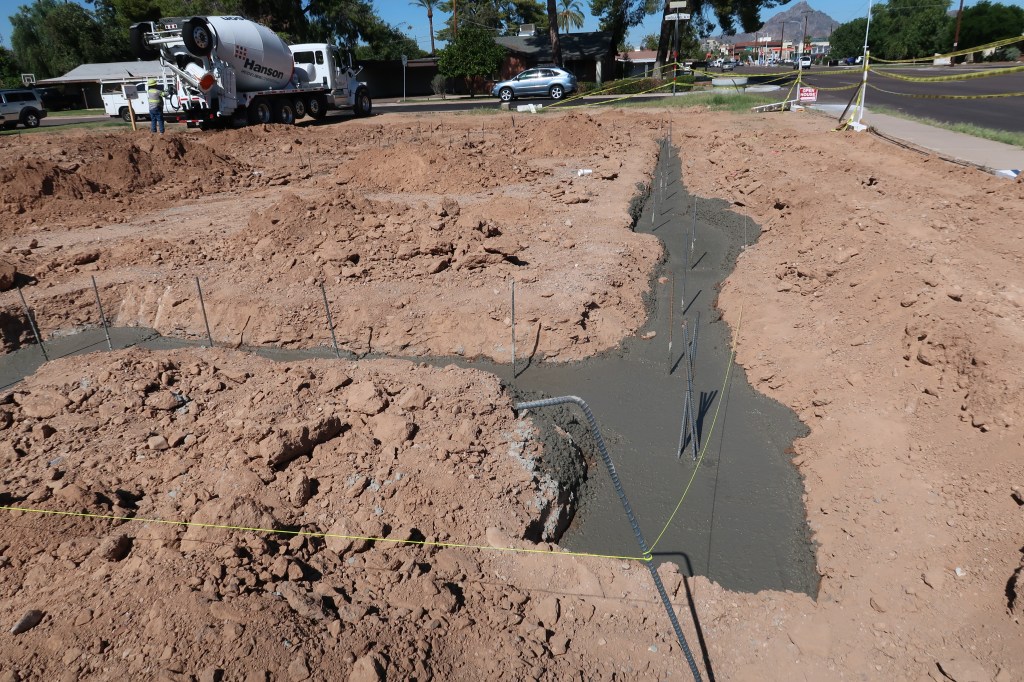
The next step is for heavy plywood “forms” to be placed that will form the 6 inch stem walls. The stem walls lift the walls of the house off grade, so that the house doesn’t simply sit at ground level when it rains. The stem wall is probably going to be at least a foot high, not exactly sure yet.
Digging the Footings
The time has arrived to actually start digging the footers or footings as people interchangeably call them. The footings are poured to form the perimeter of the house upon which the stem walls are placed, which in turn support the regular exterior walls of the house, which in turn supports the roof. So basically, the entire weight of the structure rests on the footings.
It feels like it took a long time to get to this point in the project, the time when I can finally see ground-work being done and the first sense of genuine construction. There were so many things that had to be done before getting to this point. Getting plans drafted, approved, and paid for. Learning that the property didn’t have existing taps for sewer and water and having to install them in that order (sewer always goes before water) and repaving the asphalt that was removed to access both lines. Removing the old fencing that separated my lot from the neighbor’s lot plus several trees and palm trees. Grading the land and putting in a certified pad.
The footings themselves have also been a sore spot, a financial sore spot to be accurate. Because of the crappy soil on the lot, the footings have to be 3 feet in depth. Normally, footings are 12 inches or 18 inches in depth. Thus, this project requires two to three times as much excavation and concrete and rebar as a normal project would. What’s doubly frustrating is that when you look around the neighborhood, the houses are all built on normal foundations and while it is conceivable my lot is uniquely porous, I honestly doubt it. And those other houses seem to have lasted at least 80 years without issue, so I have no idea why the code is so demanding.
We also had to build a “certified pad” before digging and pouring the footings. This meant dirt had to be removed from the surface of the lot and then the soil compacted with some sort of steamroller-thing and then additional dirt brought onto the site and further compacted so that the house, including the footings, stem wall, and slab-on-grade would all rest on stable soil. One purported benefit of the certified pad was that we could use the depth of the pad itself as part of the total depth of the footings. For whatever reason, however, the depth of the pad ended up being just 6 inches deep above grade, so we still had to dig 30 inches below the regular lay of the land for the footings. I guess I had thought the certified pad would be at least 12 inches tall and thus we would only have to dig 24 inches into the soil, but that is not the case.
Just digging the footings was the starting but not the ending point. I had to call the City’s Planning and Zoning Department to schedule an inspector from the city to come and approve the footings. The inspections are segmented. The first inspection is after the footings have been dug and the rebar has been placed and tied. The inspector will check to make sure the footings are at the right depth, the rebar is tied properly, and it all has to be in the right place in terms of distance from setbacks and property lines. Planning and Zoning doesn’t give you the telephone number for the inspector they intend to send, so you just give the Planning and Zoning your telephone number and on the day of inspection, they call an hour beforehand and go to inspect. My concrete guy says he usually isn’t there during inspection, the inspector either leaves a green tag–presumptively “good”–or you can access some electronic system to read comments when the inspection turns up things that need correction.
Another thing to think about is penetrations to the structure–for things like the sewer line– that have to go past or better put through the footings, as you want to “block out” those areas of penetration before pouring the concrete. We have not placed those blockings in yet, but from what I understand, we will put a piece of styrofoam (or something like that) where we want the penetration(s) and the wet concrete just ends up surrounding the block during the pour. After you remove the styrofoam, it leaves a cavity. Dumb as it sounds, I’m curious if the foam blocking is simply some sort of styrofoam tube or an actual rectangular shaped block, as pipes are circular so I suspect the styrofoam should also be circular.
Additionally, we will have to put a “ground wire” to attach to the rebar, which is also called a “ufer” (the name of the guy who invented the process was a Mr. Ufer). My concrete guy said the ufer is about 20 feet long below ground and needs to be tied to the rebar, and then another 10 feet of wire needs to be above ground to connect to the electrical box. The ufer takes the energy from an electrical surge and distributes it through the rebar and into the surrounding concrete and then into the surrounding soil. The concrete is continually absorbing moisture from the surrounding soil and thus becomes relatively conductive, so electricity goes from the ufer to the rebar to the concrete and finally into the soil. My GC said that there were ways of tying the rebar to act as a ufer and avoid having to pay for 30 feet of copper per unit, but my concrete guy is unfamiliar with this. The timing of the ufer installation is important; people will steal copper and we want to place the ufer just before the inspector comes and pour concrete immediately thereafter so that the ufer isn’t visible for theft.
There are more minor details that were done or have to be done. We had to put a hose bib on the water line for access to water and put a key on it, because otherwise people will open the water valve and…take a shower or who knows. The rebar end points need to have little plastic caps put on to prevent someone from hurting themselves if they were to fall into the trenching. Just, lots of little details, but at the end of the day, I’m hoping to have a very strong foundation that is completely up to code. The foundation is truly the foundation of the project; a bad foundation means a bad structure, which means a sad project.
